ADI: Adding a Map to Your Site
2 min read
In this article
- Adding a map to your site
- Changing the location on your map
- Changing the color of your map
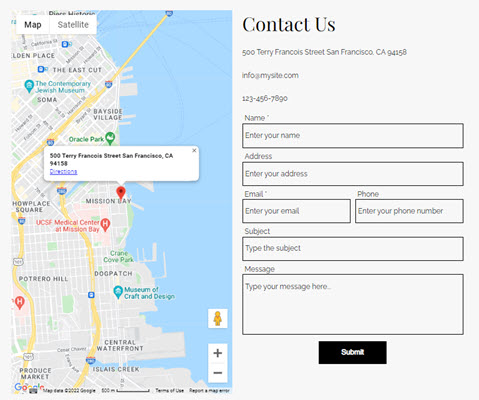
Display a Google Map on your site so that your site visitors can easily visualize your business location. To add a map, you must add a Contact section. You can change your address at anytime and choose a color scheme that suits your site's design.
In this article, learn more about:
Adding a map to your site
To add a map to your site, you must add a contact section. Then select the checkbox next to Map to make it visible.
To add a map:
- Hover over Add at the top of ADI.
- Click Section to Page. (If you want a whole contact page, click Page.)
- Click Contact.
- (If necessary) Select the checkbox next to Map to make the map visible.

Changing the location on your map
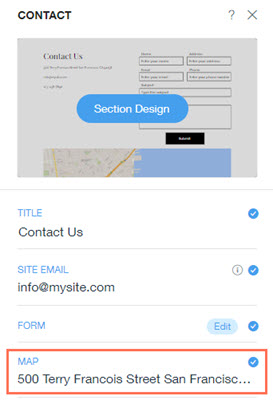
When you add a map to your site, a standard address is displayed. You can change this to your own address in a just a couple of clicks.
To change the location on your map:
- Click the Contact section on your site.
- Type your address in the Map field.
Tip:
If your Google Map does not show the correct address, we recommend pasting the coordinates of your location in the Map field, instead of the address.
Changing the color of your map
Choose a color template that best suits your site's style and apply it to your map.
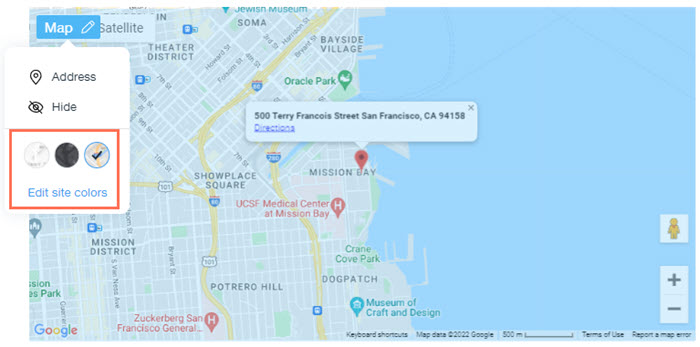
To change the color of your map:
- Click the Contact section on your site.
- Hover over the map and click Edit.
- Select one of the map coloration options.
Note:
You can add several maps to your site in ADI, but they are all synced, and display the same address. When you change the location on one map, the location on the rest of the maps on your site also change. If you want to add multiple maps to your site with different addresses, then you need to head to the Editor.
