CMS: Adding and Setting Up a Dataset
11 min read
A dataset serves as the bridge connecting elements on your page to the content in your CMS (Content Management System) collection. Use datasets to create a two-way connection for displaying collection content, storing user input values, or both. You can control which items appear, the order in which they display, and how many can load at a time from your dataset settings.
This article walks you through adding and setting up a dataset first, then connecting page elements to it. Alternatively, you can create the dataset during the process of connecting supported elements to your CMS collection.
Before you begin:
Make sure to add the CMS to your site if you haven't already.
Step 1 | Add a dataset
In your editor, go to the page in which you want to connect elements to a CMS collection and add a dataset. If you want to use the dataset to collect visitor submissions, choose the form dataset.
Wix Editor
Studio Editor
- Go to your editor.
- Go to the page in which you want to add a dataset.
- Click CMS
 on the left of the editor.
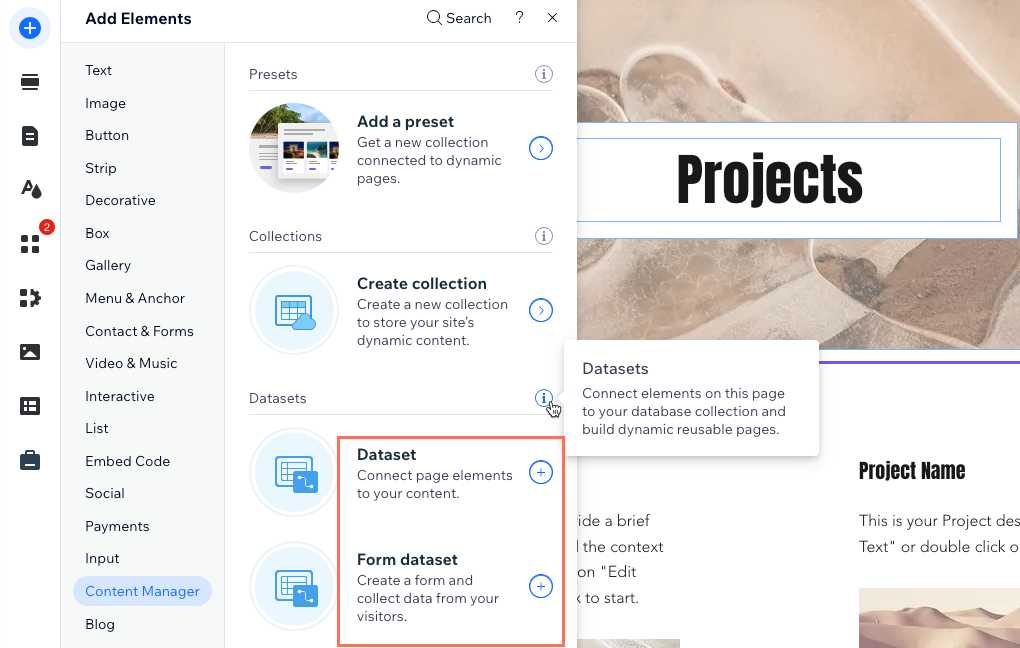
 - Click Add Content Elements.
- Click the dataset type you want to add:
- Dataset: Add a blank dataset to connect page elements so they can display content from your collection.
- Form dataset: Add a dataset configured to accept form submissions from site visitors.
Step 2 | Connect the dataset to a collection
Choose which collection you want to connect your dataset to. You will use this collection to either display content on your page elements, capture visitor inputs, or both.
Wix Editor
Studio Editor
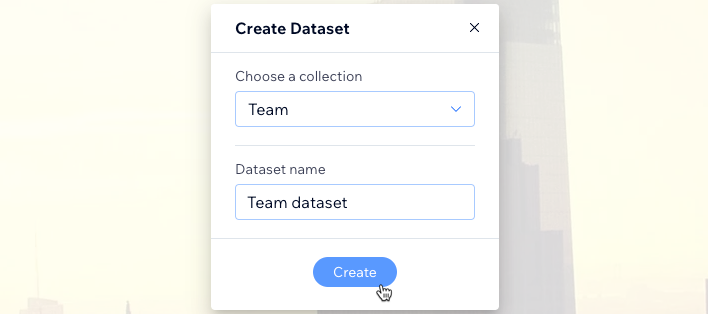
- Click the Choose a collection drop-down and select the collection you want to connect.
Tip: Select Create Collection to create a new collection. - (Optional) Click the Dataset name field to edit the name of the dataset.
- Click Create.
Step 3 | Edit the dataset settings
Choose a dataset mode to control whether the dataset can read content from the collection, write content to the collection, or both. Edit the maximum items that can display per load if you plan to connect the dataset to a repeater or gallery. Add filters to include or exclude specific items from appearing in elements you connect to the dataset and add sorts to control the order in which they appear.
Wix Editor
Studio Editor
- (Velo only) In the dataset settings, edit the Dataset ID used to identify the dataset in your page's code, if necessary.
- Click the Dataset mode drop-down and select an option:
- Read: Connected elements can read and display content from your collection. The elements cannot modify the collection content.
- Write: Connected elements cannot display content from the collection. Input elements can add content to the collection but cannot modify the collection's existing content.
- Read & Write: Connected elements can display content from your collection. Input elements can add or edit content in your collection.
- (Optional) Click the Collection Permissions permission type to edit your collection's permissions & privacy settings.
- Edit the Maximum items displayed field to set the maximum items that can initially load in connected repeaters or galleries. This is also the maximum items that load in repeaters and galleries when visitors click "Load More" buttons, "Next/Previous Page" buttons, or pagination bars.
- (Velo only) Select the relevant checkboxes under Performance:
- Fetch after the page loads: The dataset's data is fetched only after the rest of the page has finished loading. This means the initial rendering of the page will not be blocked by this dataset, making the page load faster. We recommend this option when elements displaying the data are not initially visible. For example, if they require scrolling into view or opening a section.
- Fetch pages using cursors: The dataset will load initial and subsequent data using sequential cursors. This makes data loading faster at the expense of only allowing navigation between next and previous pages of data. Navigating between different pages with a pagination bar or 'Next/Previous page' dataset actions is not available with this option.
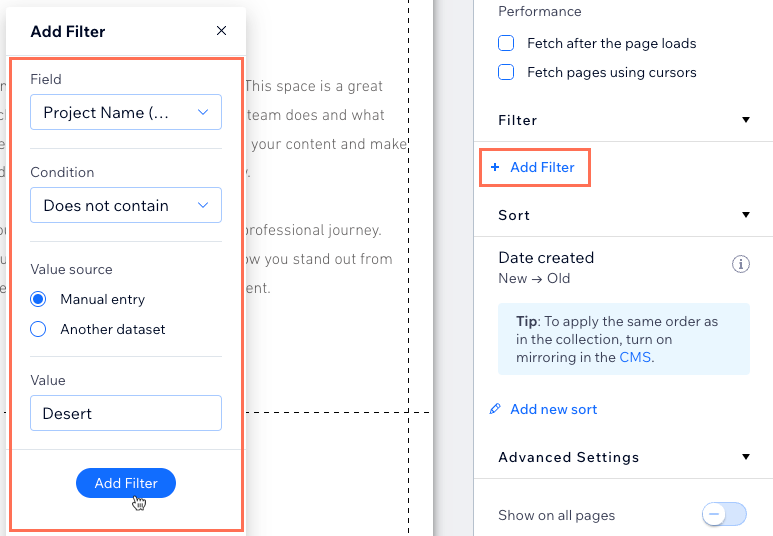
- (Optional) Add a filter to include or exclude items from the dataset:
- Click + Add Filter.
- Click the Field drop-down and select the field you want to filter.
- Click the Condition drop-down and choose the condition to use in the filter.
- (If necessary) Select the Value source:
- Manual entry: Enter the value you want to filter in the Value field.
- Another dataset: Select another dataset and the field you want to filter from the relevant drop-downs.
- Click Add Filter.
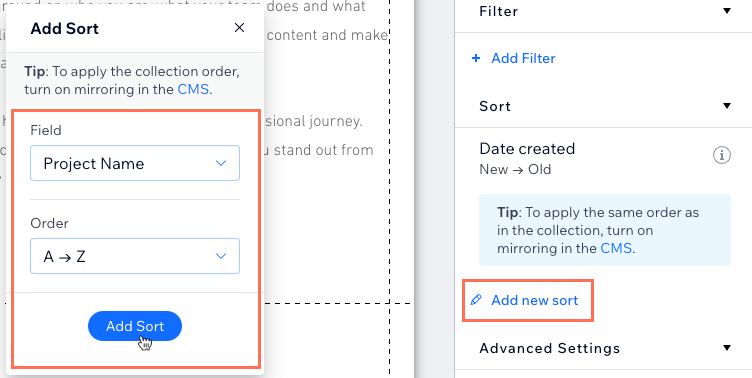
- (Optional) Add a sort that controls the order in which connected items display:
Tip: Alternatively, you can display items in the same order as they appear in your collection view by enabling 'Mirror on Site'. If you've enabled 'Mirror on Site', you can add sorts to the dataset to override the order used in your collection.- Click + Add new sort.
- Click the Field drop-down and choose the field you want to sort.
- Click the Order drop-down and choose the order you want the content to appear in.
- Click Add Sort.
- (Optional) Enable the Show on all pages toggle under Advanced Settings to use the dataset globally across all site pages. This allows you to connect elements in your header or footer to your CMS collection.
Note: Adding many global datasets may slow your site's performance.
Learn more about:
Step 4 | Connect page elements to the dataset
Now it's time to connect the page elements to your dataset so they can read or write content. You'll see different connection options depending on the element you connect. If you're connecting an image or a button, you can choose click actions to determine what happens when visitors click them (e.g. load more, submit, next item).
Wix Editor
Studio Editor
- In your editor, select the element you want to connect to the dataset.
- Click the Connect to CMS icon
 .
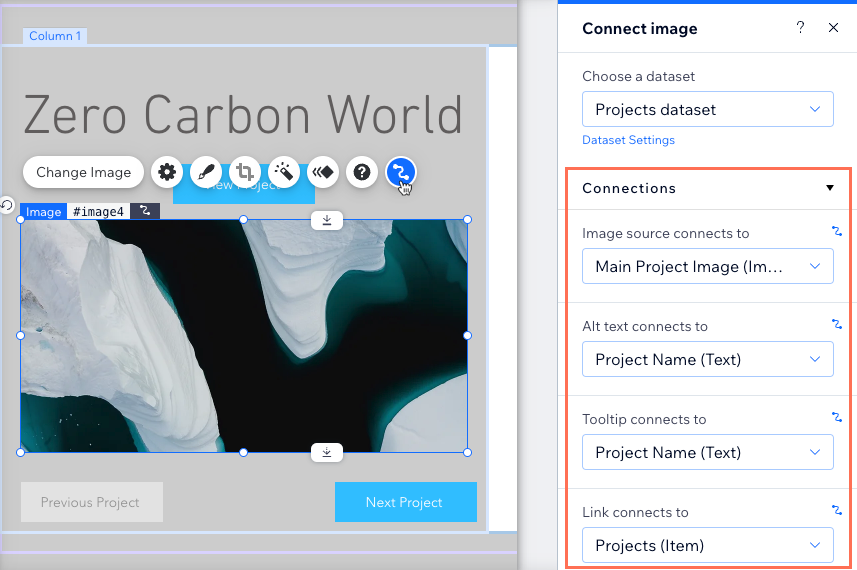
. - Click the Choose a dataset drop-down and select the dataset you want to connect.
- Click the relevant drop-down menus under Connections and choose the collection fields or dataset actions you want to connect to each part of the element. The connection options vary depending on the type of element you connect.
- Click Preview to test your CMS connections.
- Click Publish if you are ready to make the changes go live.
FAQs
Click a question below to learn more about setting up datasets.
How do I control how much content appears in repeaters and galleries?
Can my dataset display content from different collections?
Can I connect text elements to show the total items in a collection?
Can I control the order in which the items display on my live site from my collection?
How do I link buttons or images to an item's dynamic item page?

Did this help?
|