ADI: Adding and Setting up a Payment Form
4 min read
In this article
- Step 1 | Add a form to your site
- Step 2 | Choose a type of payment form
- Step 3 | Connect a payment method
Increase your sales by adding a payment option to your forms, allowing visitors to purchase a product or service while submitting a form on your site. Once you add a form to your ADI site you can update its settings to start accepting payments.
Before you begin:
Accepting payments with Wix Forms is only available with Business and eCommerce Premium plans. Learn more about upgrading Wix Forms with a Premium plan and connecting your site to a payment method.
Step 1 | Add a form to your site
You can add a payment option to any of the forms available in ADI. First add a new section, then choose a type of form.

To add a form to your site:
- Go to the page in ADI where you want to add the form.
- Hover over Add at the top.
- Click Section to Page.
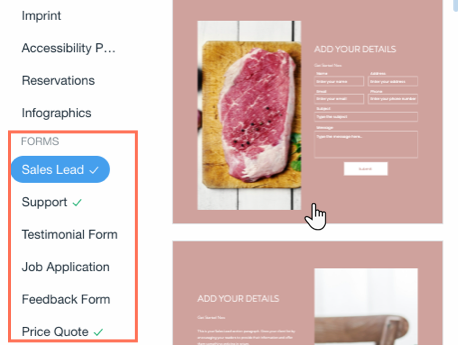
- Scroll down to Forms and choose a type of form.
- Pick a section design for your form and click and drag it onto your site.
Step 2 | Choose a type of payment form
Next, edit your form's settings and choose a type of payment form. Make sure you've upgraded to a Premium plan first.
To choose a payment form:
- Click the section with the form in ADI.
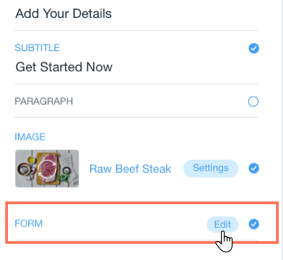
- Click Edit next to Form at the bottom of the section panel.

- Click Form Settings.
- Click Get Started under Get paid with this form.
- Choose a type of payment form. Depending on the type you choose you will see different options.
Single item
List of items
Visitors enter price
6. Click Next to connect a payment method.
Step 3 | Connect a payment method
The final step of adding a payment option to your form is connecting a payment method. You set this up in the Accept Payments area in your site's dashboard.
Note:
If you've previously connected a payment method, you can skip steps 1-2 below.
To connect a payment method:
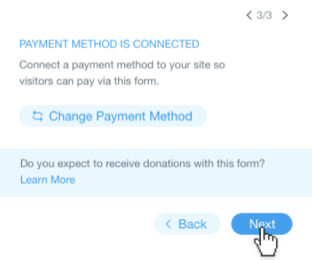
- Click Connect Payment Method.
- Connect a payment method from Accept Payments in your site's dashboard. Learn more
Note: If you haven't yet upgraded to a Premium plan, you will be asked to upgrade at this step. - Once a payment method is connected, click Next on the form.

- Click Done to finish setup.
Tips:
- You can change the payment method and remove it at any time. Click the Settings icon
 next to Payment Settings status and choose an option.

- You can also click View Payments to see how many people have paid with this form.
 to make changes or the Delete icon
  to remove it.