


Wix Restaurants: Setting Up Seating Areas for Table Reservations
- Step 1 | Enable seating areas
- Step 2 | Manage seating areas and assign tables
- Step 3 | Customize the guest-facing area selection
- FAQs
Seating areas are named groups of tables, such as Dining Room, Bar, or Patio, that help organize where guests can sit. Restaurant owners set them up, guests can choose a preferred seating area while booking, and staff can view or filter reservations by that preference in the dashboard.
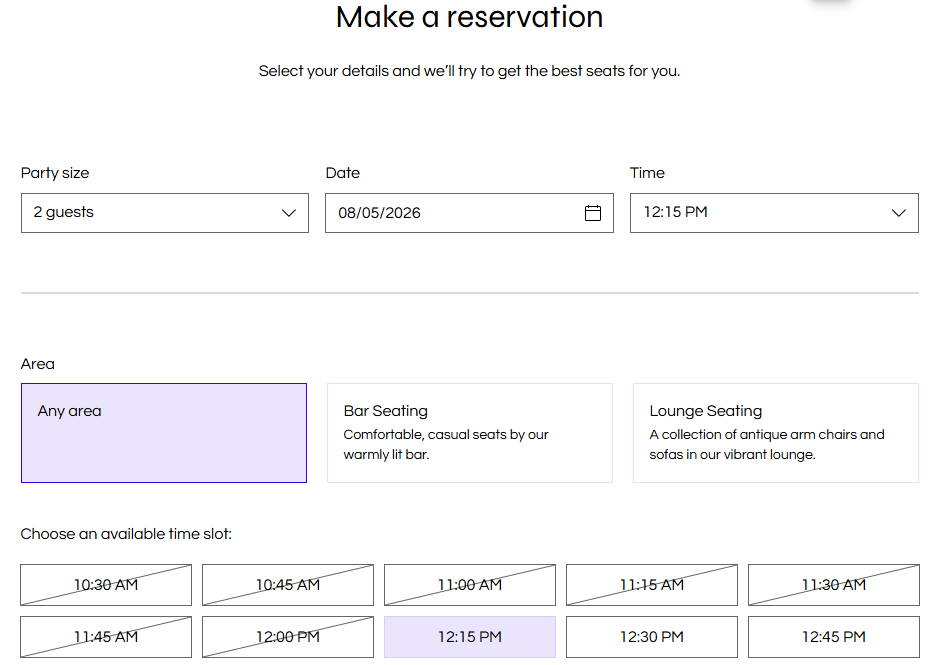
Step 1 | Enable seating areas
Turn on seating areas in Table Management to organize your restaurant into clear table groups.
Existing reservations stay as they are when you first enable seating areas.
If you delete a seating area later, existing reservations keep that area label. Guests can no longer choose that area for new bookings.
To enable seating areas:
Go to Table Reservations in your site's dashboard.
Click Enable Areas next to Use seating areas.
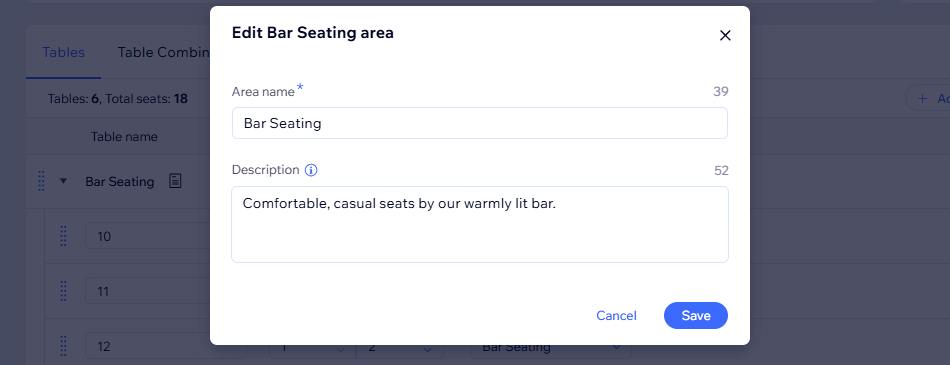
In the Enable areas pop-up, add a name in the Area name field.
Enter details in the Description field if needed.
Tip: Add notes about the atmosphere, accessibility, or seasonal use of the area.Click Add area.
Click Save to apply the new seating area settings.
Step 2 | Manage seating areas and assign tables
After enabling seating areas, build out the sections you need and assign each table to the right area. This is where you add more areas, rename existing ones, remove areas you no longer use, and organize tables by area.
If you delete a seating area, existing reservations keep that area label, but guests can no longer choose it for new bookings.
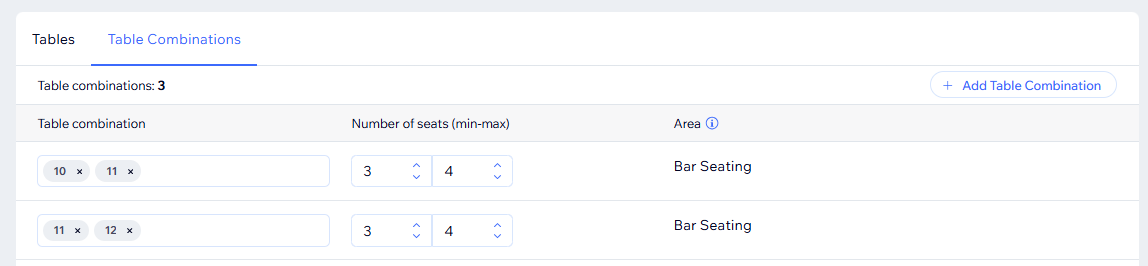
If a table or table combination conflicts with an area assignment, Wix shows a warning so you can review the setup.
To manage seating areas and assign tables:
Go to Table Reservations in your site's dashboard.
Click the Settings icon
 .
.Click Table Management.
Scroll to the Tables section.
Choose what you want to do:
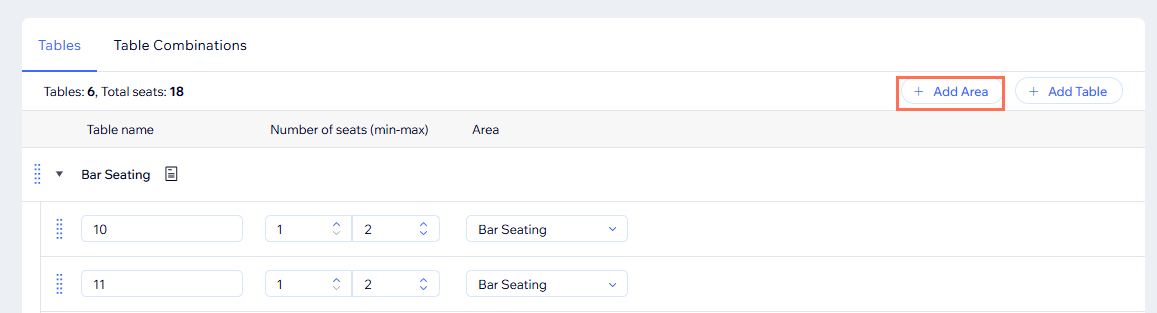
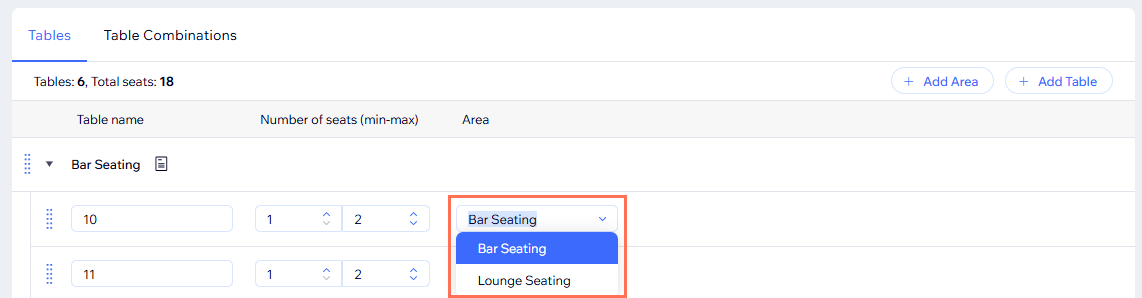
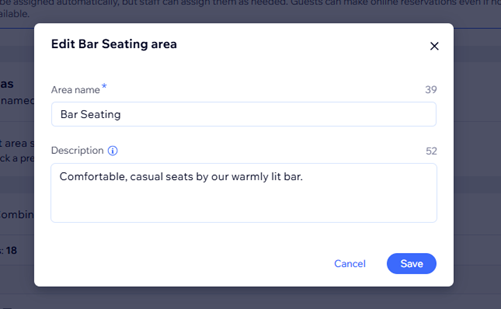
 next to the relevant area.
 next to the relevant area.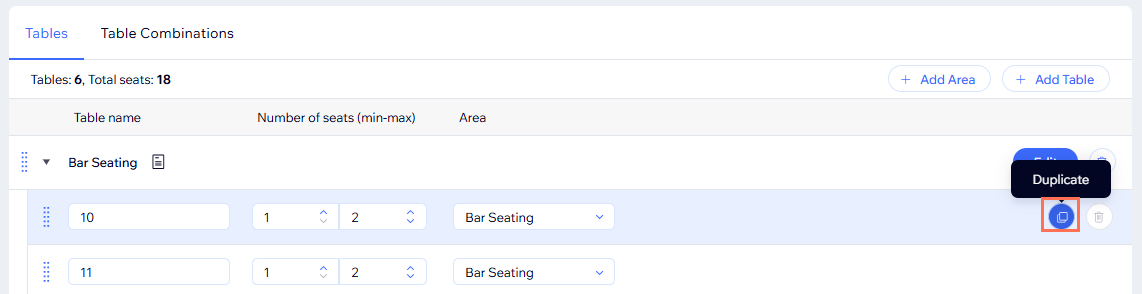
Step 3 | Customize the guest-facing area selection
Once your seating areas are set up, choose whether guests see them during booking and how they appear in the Reservations widget. This lets you decide whether guests choose from cards or a dropdown and whether area descriptions appear on the form.
Go to Table Reservations in your site's dashboard to ensure the Allow guest area selection toggle is enabled.
To customize the area selection:
Click the Switch Page drop-down at the top of the editor, then click Reservations under Restaurant Pages.
Click the Reservations widget on the page.
Click Settings.
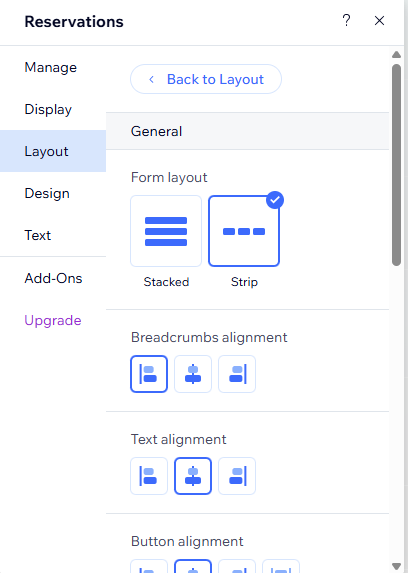
Click Layout.
Click General.
Choose the form layout: Select Stacked or Strip.
Set the alignment: Customize Breadcrumbs alignment, Text alignment, and Button alignment.
Adjust the spacing: Customize Side padding, Top & bottom padding, Space between title & description, Space between text & form, Space between form and time slots.
Adjust the width: Set the Button width.
Click Back to Layout, then click Areas.
Select an Areas style.
Cards: Show each seating area as a separate card.
Dropdown: Show seating areas in a dropdown list.
Adjust the available layout options:
Set the alignment: Customize Cards alignment and Text alignment.
Adjust the spacing: Customize Space between cards, Top & bottom paddings, and Side paddings.
FAQs
Click a question below to learn more.
