Elevate your brand by creating personalized business cards with the the Wix Logo Maker. Choose from a range of card templates and customize the content, font, colors, images and more to make it your own.
With the Wix Logo Maker, you can create as many business card designs as you want, and purchase them later. You'll find all your designs under your Brand Designs in the Brand Studio.
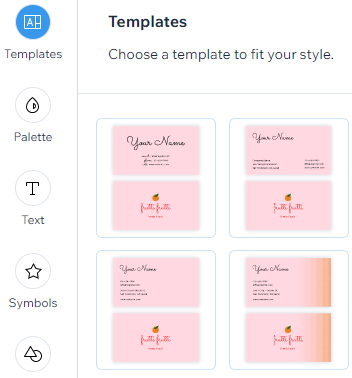
Step 1 | Select a card template
Start off by selecting the brand you want to work on. Then, choose a template from our range of professional business card designs.
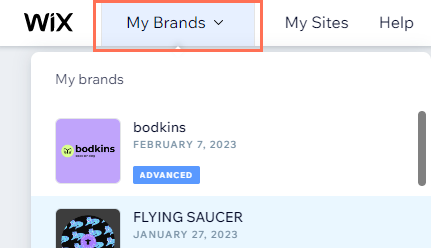
- Go to the Brand Studio.
- Click the My Brands drop-down at the top.
- Select the relevant brand.
- Scroll to the Design a branded business card section.
- Click Customize on the template you like best.
Tip: Click Explore all to view more template suggestions.
Step 2 | Customize your business card
After choosing your card's template, you can start designing it from the business card editor. From this editor you can customize the card's text, image, color and more.
Click an option below to learn how to customize it:
- Click the Templates icon
 to choose a new card template.
 - Scroll through the available templates and select the one you like best.
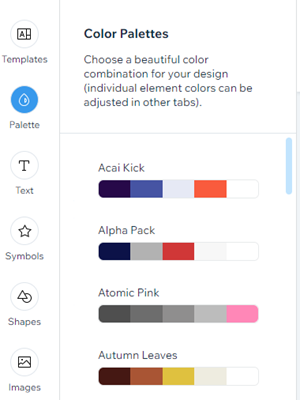
- Click the Palette icon
 to change the card's color palette.
 - Scroll through the available color palettes and select the one you like best.
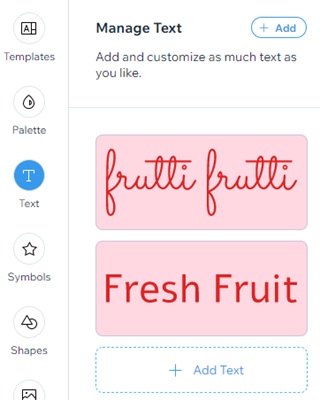
- Click the Text icon
 on the left.
 - Hover over the text you want to customize and click Customize.
Note: If you haven't yet added text, click Add Text. - Customize the text using the following options:
- Edit text: Click the text field to replace the text.
- Font: Click Change Font to select a new font. Scroll through the available fonts and click the one you like best.
- Alignment: Select your text's alignment (left, center, right).
- Text fill color: Click the color box to change the text's color. Choose from the colors based on your color palette, or add a new color.
- Fill color opacity: Drag the slider to adjust the transparency of the text.
- Outline width: Drag the slider to increase or decrease the outline around your text.
- Text outline color: Click the color box to choose the color of your text's outline, or enter a HEX code.
- Size: Drag the slider to change the text's size (between 1 and 400 pixels)
- Letter spacing: Drag the slider to adjust the space between the letters.
- Flip: Click the relevant icon to flip the text horizontally or vertically.
- Rotate: Drag the slider to rotate the text.
- Text Curve: Drag the slider to bend the text into a curve.
- Horizontal position: Drag the slider to move the text left or right.
- Vertical position: Drag the slider to move the text up or down.
- Shadow: Click the toggle to enable a shadow behind the text and edit the following:
- Shadow color: Click the color box to select the shadow's color.
- Shadow opacity: Drag the slider to adjust the shadow's transparency.
- Shadow horizontal position: Drag the slider to move the shadow left or right.
- Shadow vertical position: Drag the slider to move the shadow up or down.
- Shadow blur: Drag the slider to adjust the blurriness of the shadow.
- Blur: Click the toggle to enable blurring. Drag the slider to adjust the blurriness of the text.
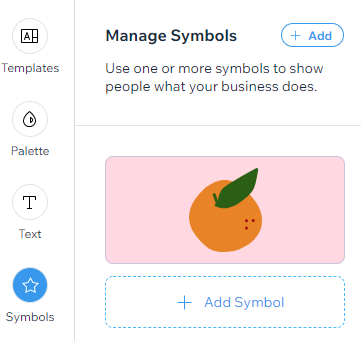
- Click the Symbols icon
 on the left.
 - Hover over the icon you want to edit and click Customize.
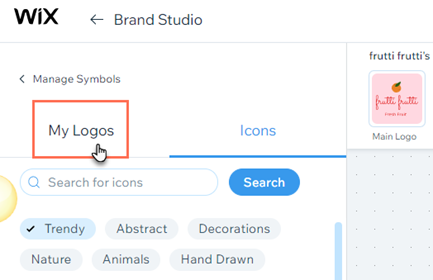
Tip: To add your logo to the card, click Add next to Manage Symbols, then click My Logos and select your logo.
- Customize your icon using the following options:
- Icon: Click Change icon to replace the existing icon.
- Color: Click the color box to edit the logo's color.
- Opacity: Drag the slider to adjust the transparency of the icon.
- Size: Drag the slider to change the icon's size.
- Flip: Click the relevant icon to flip the icon horizontally or vertically.
- Rotate: Drag the slider to rotate the icon.
- Horizontal position: Drag the slider to move the icon left or right.
- Vertical position: Drag the slider to move the icon up or down.
- Shadow: Click the toggle to enable a shadow behind the icon and edit the following:
- Shadow color: Click the color box to select the shadow's color.
- Shadow opacity: Drag the slider to adjust the shadow's transparency.
- Shadow horizontal position: Drag the slider to move the shadow left or right.
- Shadow vertical position: Drag the slider to move the shadow up or down.
- Shadow blur: Drag the slider to adjust the blurriness of the shadow.
- Blur: Click the toggle to enable blurring. Drag the slider to adjust the blurriness of the icon.
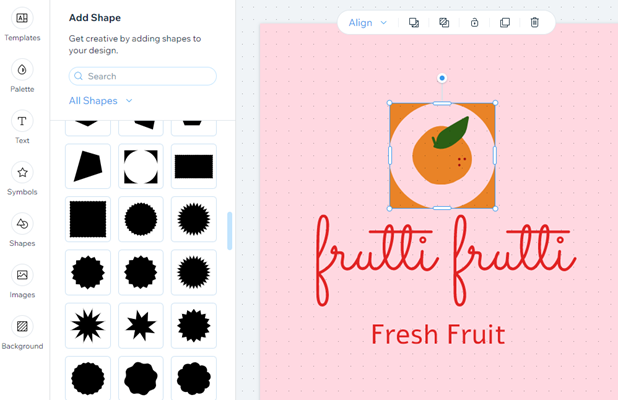
- Click the Shapes
 icon on the left.
Note: If you haven't yet added a shape, click Add Shape. - Hover over the shape you want to edit and click Customize.
- Edit the shape by using the following options:
- Shape: Click Change to select a new shape you want to add to your logo.
- Fill color: Click the toggle to enable color inside the shape's border.
- Color: Click the color box to select the shape's color.
- Opacity: Drag the slider to adjust the transparency of the shape's color.
- Border: Click the toggle to display a border around your shape, then edit the following:
- Border width: Drag the slider to adjust the width of your shape's border.
- Border color: Click the color box to select the shape's border color.
- Border opacity: Drag the slider to adjust the border's opacity.
- Width: Drag the slider to increase or decrease the shape's width.
- Height: Drag the slider to increase or decrease the shape's height.
- Flip: Click the relevant icon to flip the shape horizontally or vertically.
- Rotate: Drag the slider to rotate the shape.
- Horizontal position: Drag the slider to move the shape left or right.
- Vertical position: Drag the slider to move the shape up or down.
- Shadow: Click the toggle to enable a shadow behind the shape and edit the following:
- Shadow color: Click the color box to select the shadow's color.
- Shadow opacity: Drag the slider to adjust the shadow's transparency.
- Shadow horizontal position: Drag the slider to move the shadow left or right.
- Shadow vertical position: Drag the slider to move the shadow up or down.
- Shadow blur: Drag the slider to adjust the blurriness of the shadow.
- Blur: Click the toggle to enable blurring. Drag the slider to adjust the blurriness of the shape.
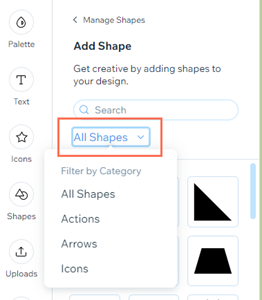
Tip: Narrow down your search for your shape using the filter option in the
Add Shape panel.
- Click the Images icon
 on the left.
 - Upload an image or select an image from the Wix Exclusive Images library:
- Upload an image:
- Click + Upload.
- Click + Upload Media.
- Select the image(s) you want to upload and click Open.
- Click Add to Logo.
- Use a Wix Exclusive image:
- Type your keywords into the search bar and press Enter on your keyboard.
- (Optional) Click the Orientation or Color drop-down to filter your search.
- Hover over the image you want to use and click Add.
- Customize your image using the following options:
- Size: Drag the slider to increase or decrease the size of your image.
- Opacity: Drag the slider to increase or decrease the transparency of your image.
- Flip: Flip your image horizontally or vertically.
- Rotate: Drag the slider to rotate your image.
- Horizontal position: Drag the slider to move your image left or right.
- Vertical position: Drag the slider to move your image up or down.
- Shadow: Click the toggle to enable a shadow around your image and edit the following:
- Shadow color: Click the color box to select the shadow's color or enter a hex code.
- Shadow opacity: Drag the slider to increase or decrease the transparency of your shadow.
- Shadow horizontal position: Drag the slider to move your shadow left or right.
- Shadow vertical position: Drag the slider to move your shadow up or down.
- Shadow blur: Drag the slider to increase or decrease the blurriness of your shadow.
- Blur: Drag the slider to increase or decrease the blurriness of your image.

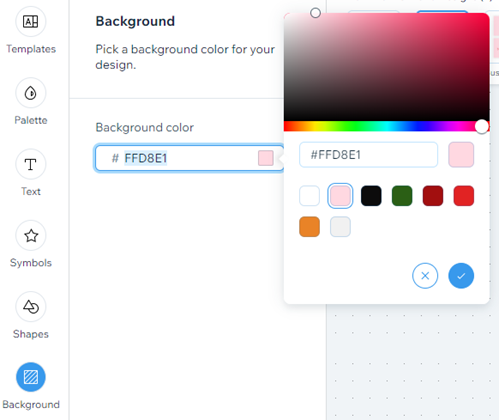
- Click the Background icon
 on the left.
 - Click the color box to change the background color. Choose from the suggested colors or select your own.
You can easily adjust an element's location or reposition it using the toolbar below:

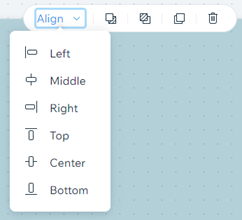
To reposition elements using the Align drop-down:
- Click the element you want to reposition.
- Click Align on the toolbar.
- Select the position you want to move your element into.
To rearrange elements using the same toolbar:
- Click the element you want to arrange.
- Click the relevant option:
 Move forward: Moves the element forward one layer.
 Move backward: Moves the element backward one layer.
 Duplicate: Adds a copy of your element to the canvas.
 Delete: Deletes the element.
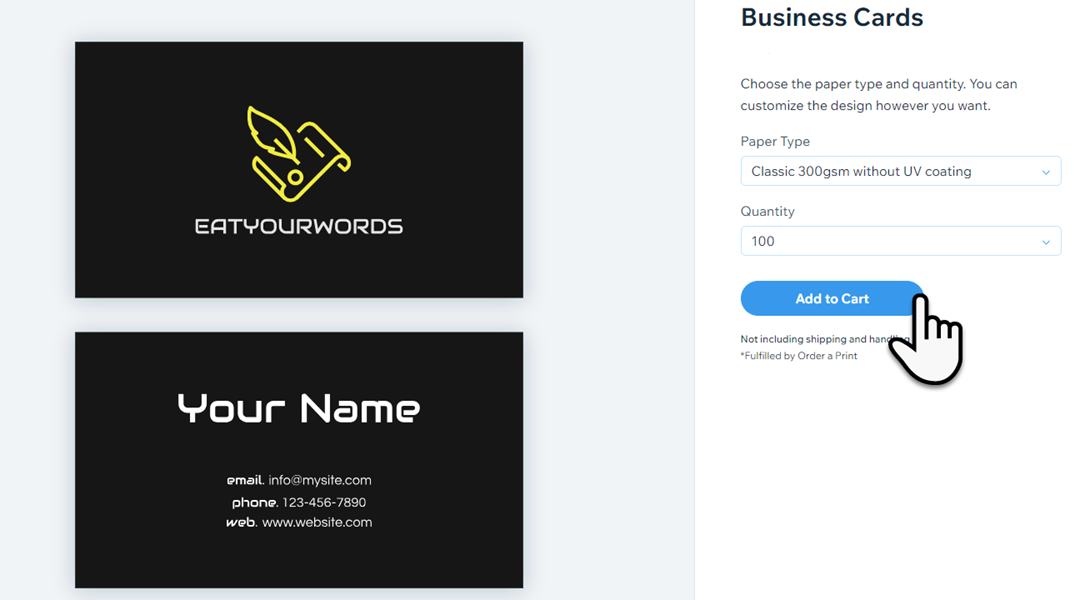
Step 3 | Order your business card prints
Once you've customized your card and you're happy with the design, you can order your physical cards through your dashboard.
To order your business cards:
- Click Order Prints.
- Review Order a Print information and click OK to proceed.
- Click the Paper Type drop-down menu and select the paper thickness and finish you want.
- Click the Quantity drop-down menu and select how many cards you want to order (100, 250, or 500 cards).
- Click Add to Cart.
- Click Continue to Checkout.
- Enter your shipping details and click Save & Continue.
- Confirm your payment method and click Submit Purchase.
Step 4 | (Optional) View your order history
You can go back and review your order history at any time to check details such as your payment amount and order date.
To view your order history:
- Click the Brand Actions drop-down.
- Click View Print Orders.