Wix Events: Using Wix Groups to Promote Your Events
2 min read
Wix Groups is an app that allows you to create a place for members to post updates, share images and videos, have discussions, and more. It's like having your own social media platform.

In this article, learn how to:
Creating a group for an event
Create a group from inside the Wix Events dashboard. All the guests who register for your event are automatically invited to join the group.
Note:
When you use Wix Groups for the first time, 2 pages are added to your site:
- Groups List page: This page is automatically added to your site's menu. It lists all your groups.
- Group Page: This is the actual group where you and your guests can post.
To create a group for an event:
- Go to Events in your site's dashboard.
- Select the relevant published event or event draft.
- Click the Features tab.

- Click Groups.
- Click Create Group or select an existing group.
- Set a privacy level:
- Public: Anyone site visitor can view discussions and images. Event guests are automatically asked to join the group.
- Private: Only members can join and view this group. Event guests are automatically invited to join the group. If selected, choose who can join:
- Select Visible or Hidden from the Visibility drop-down.
- Choose who has access:
- Only members approved by admin: You must approve each request
- Only event participants: Any event participant can join the group
- Click Create.
- Click Done.
Next steps:
- Customize the design of the group page
- Go to the Wix Groups dashboard to customize and manage your group. Learn more about Wix Groups.
Posting your event in a group
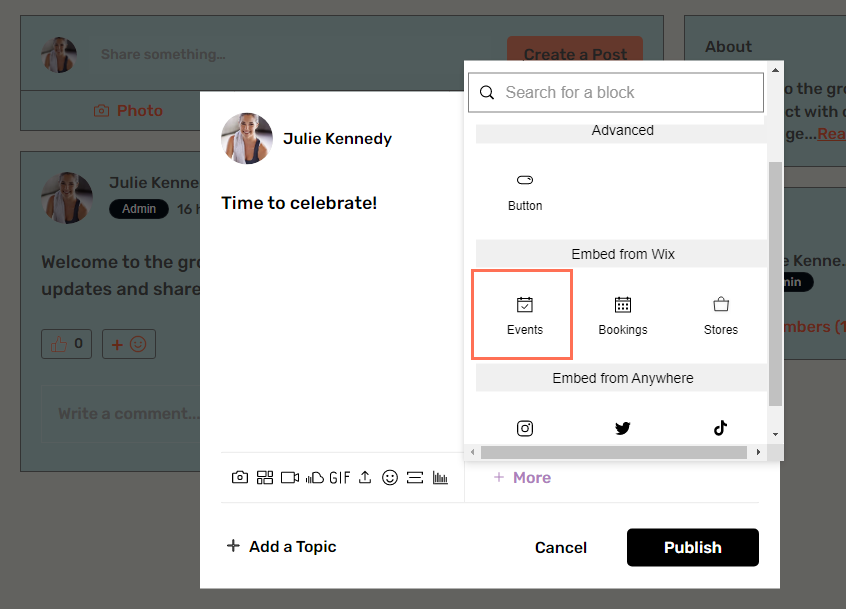
If you already use Wix Groups, you can post an event in your feed. Guests can click Register Now to sign up for your event.

To post an event in your group feed:
- Go to your group on your live site.
- Click to start a new post.
- (Optional) Write a message.
- Click +More.
- Scroll down and select Events.

- Select the relevant event.
Tip: You can search for the event name. - Click Embed Now.
- Click Publish.
Did this help?
|