Wix Bookings: About the New Wix Bookings Pages
6 min read
We recently launched new versions of the Wix Bookings pages visitors see on your site. These include the new Service Page, the Booking Calendar, and the Booking Form. You may have already seen these pages in your Editor. If not, you can manually switch to the new version.
The new versions run faster, and are more customizable. This makes it even easier for your clients to make bookings on your site.
Important update:
- You do not have to delete the old pages separately. They update automatically when you switch to the new versions.
- Any elements you manually add to your old bookings pages, like image banners, remain on the payment information page. However, you must add them manually to the new service page, booking calendar and booking form pages.
In this article, learn more about:
Updating your Wix Bookings pages
Update to the new Wix Bookings pages from your site's editor. By updating manually, you can preview the new pages and decide when to publish them. All of the relevant information automatically transfers and you now have more customization options than before.
To update your Wix Bookings pages:
In Wix Editor:
- Click Pages
 on the left side of the Editor.
 - Click Bookings Pages.
- Click Book Online.
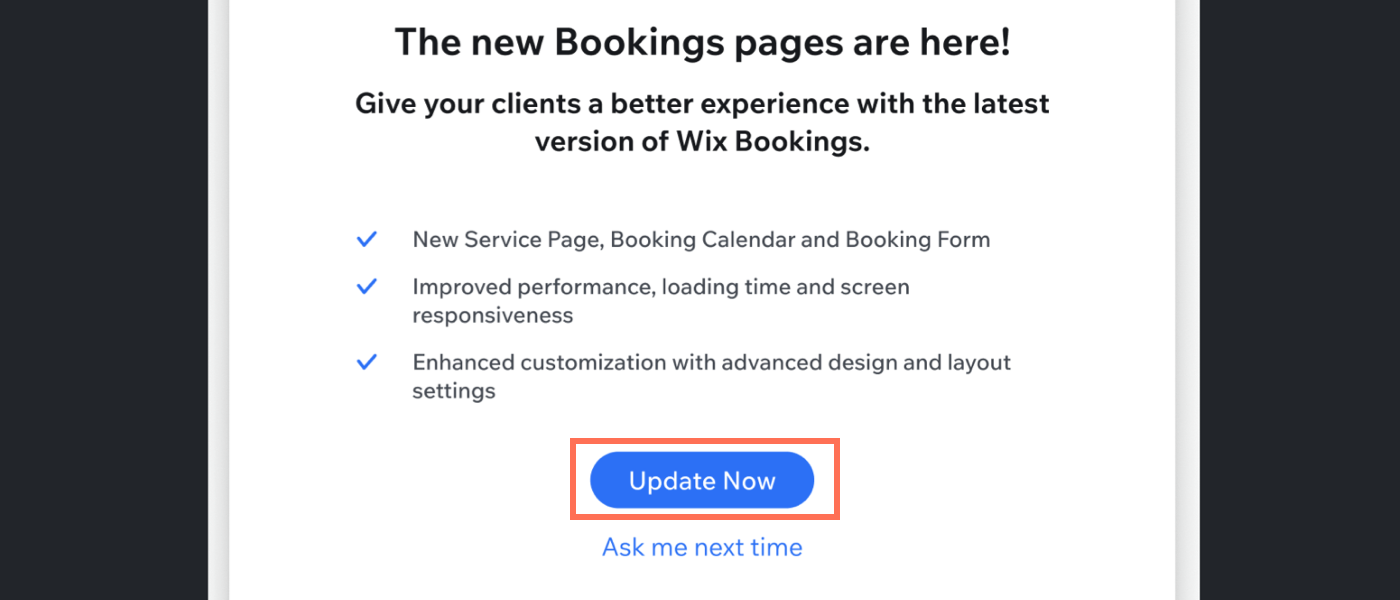
- Click Update Now in the pop-up window.
In Editor X:
- Click Pages
 at the top bar of Editor X.
 - Scroll down and select Bookings Checkout.
- Click Update Now in the pop-up window.
Customizing the new Service Page
You can now showcase your services with a faster, more responsive service page. The new page works the same way as before but with more options to customize exactly how you display your services.
To customize the new Service Page:
In Wix Editor:
- Click Pages on the left side of the Editor.
- Click Bookings Pages.
- Select Service Page.

- Click the Service Page in the Editor.
- Click Settings.
In Editor X:
- Click Pages at the top bar of Editor X.
- Scroll down and select Service Page.

- Click the Service Page in the Editor.
- Click Settings.
Tip:
Learn more about customizing the new service page.
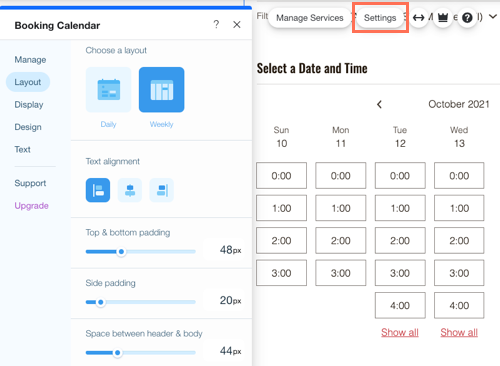
Customizing the new Booking Calendar
The new version of the Booking Calendar makes it easier than ever before to customize how you display your schedule. You can also adjust the layout, display and design settings all within the editor.
Note:
When you update your site to the new Booking calendar, your clients see the current date when making a new booking. With the previous version of the calendar, clients see the first available date.
To customize the new Booking Calendar:
In Wix Editor:
- Click Pages on the left side of the Editor.
- Click Bookings Pages.
- Select Booking Calendar.

In Editor X:
- Click Pages
 at the top bar of Editor X.
 - Scroll down to Wix Bookings.
- Select Booking Calendar.

Tip:
Learn more about customizing the new version of the Bookings Calendar.
Customizing the new Booking Form
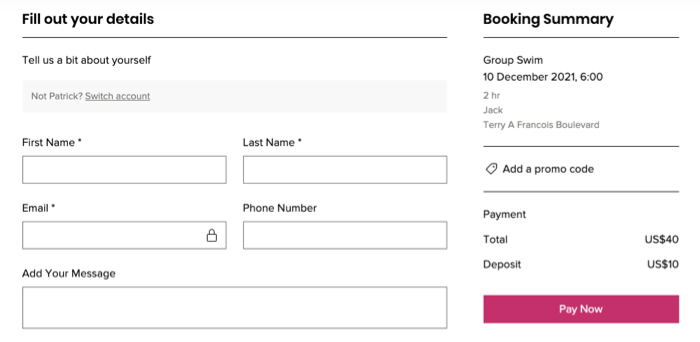
Fully customize the new Booking Form to fit your brand and site design. Align and rename the form fields, and display which services you offer online and which you offer as part of your pricing plans. You can also edit the text, fonts, button design and color scheme.
To customize the new Booking Form:
In Wix Editor:
- Click Pages on the left side of the Editor.
- Click Bookings Pages.
- Click Booking Form.
- Select the form in the Editor.
- Click Settings.
In Editor X:
- Click Pages at the top bar of Editor X.
- Click Bookings Pages.
- Click Booking Form.
- Select the form in the Editor.
- Click Settings.
Tip:
Learn more about customizing the new Booking Form.
Frequently Asked Questions (FAQs)
We are here to help with all your questions. Click a question below to learn more.
Can I switch back to the old pages?
Do the new pages appear on my site as soon as I upgrade? Do I need to delete the old pages myself?
Did this help?
|