Use a repeater to show a list of items with one design, such as portfolio projects, blog posts or team members. Connect your repeater to a data source and design one item. Every item then shows its own content in that design.
Understanding how repeaters work
Use a repeater to show one item for each item in your data source. You design one item, and every other item uses the same design with its own content.
- One source per repeater: You connect each repeater to one source: a CMS (Content Management System) collection, a Wix app's list (e.g. Wix Blog Posts) or custom code. To show content from 2 sources, add a repeater for each one.
- Content from your source: To show different content in each item, you must connect the elements to a source. Otherwise, they're static and show the same content in every item.
- Connected and static elements: Elements you connect to the source show each item's own content and have pink labels. Elements you don't connect have blue labels and look the same in every item.
- Elements that connect for you: When you connect your repeater, or change its source later, the editor connects the elements inside it to fields in your source. Check each element afterward. The editor might choose a different field than the one you want, or leave an element unconnected.
- Filters and sorts: Filters and sorts change what shows on your site, not the items in your collection. If you connect the source to your repeater, they only change that repeater. If you connect the source to the section or page, they change every element connected to that source (e.g. other repeaters in that section or page).
Adding a repeater and connecting it to a collection
Add a repeater from the Add Elements panel to start with a ready-made design and sample content. Then connect your repeater to a CMS collection. You can create a new collection from the sample content, or use a collection you already have.
To add and connect a repeater:
- Go to your editor.
- Hover over the Add Elements icon
 on the top left of the editor.
- Select Elements.
- Click the Layout Tools icon
 .
- Click the Repeaters tab.
- Drag a repeater onto the page.
- Click Choose a Collection on the repeater's banner.
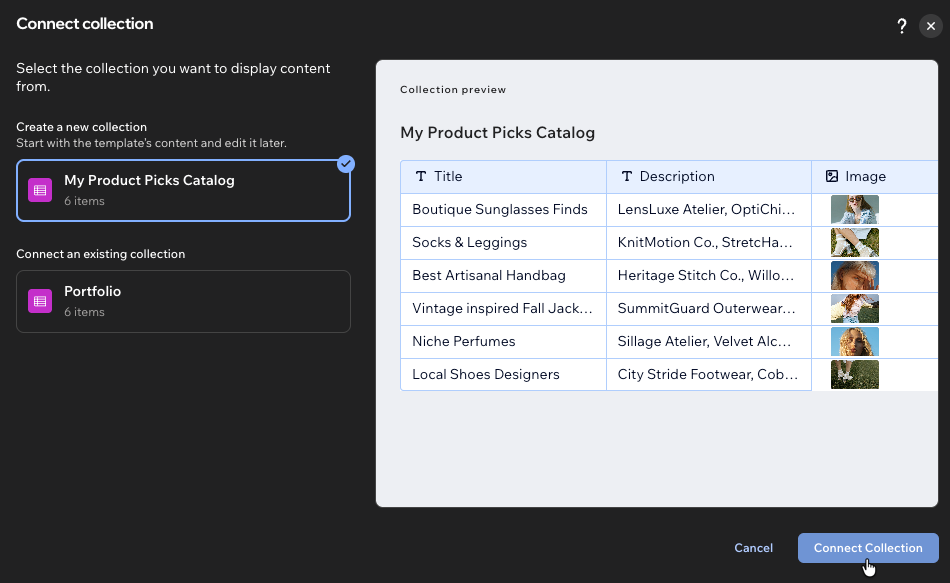
- Select the collection you want to use:
- Start from Sample Content: Create a new collection from the repeater's sample content. You can edit the content in your collection later.
- Connect an existing collection: Select a collection you already created. This list only shows if you have collections. Learn more about creating a CMS collection.
- Click Connect Collection.
To connect a repeater to a Wix app or custom code:
- Go to your editor.
- (New repeater only) Click Skip for now on the repeater's banner.
- Select your repeater.
- Click the Open Inspector icon
 at the top right of the editor.
- Click the Settings tab.
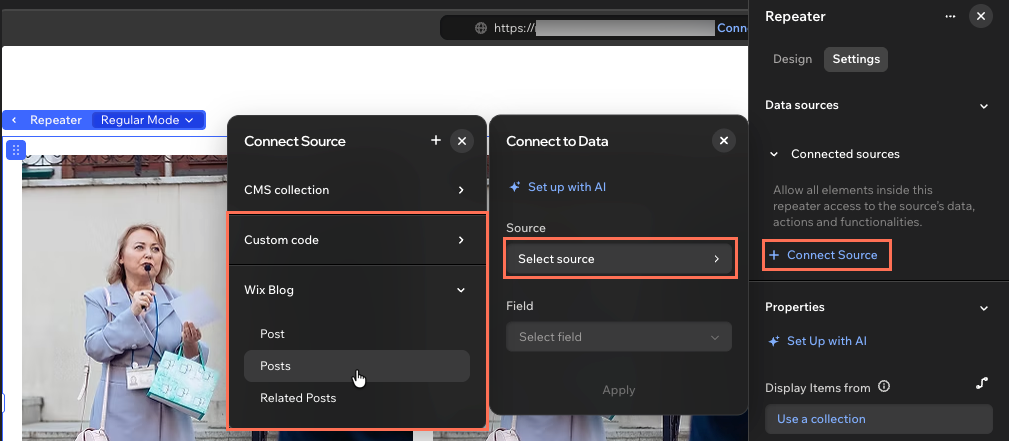
- Click + Connect Source under Data sources.
Tip: If your repeater already has a source, remove it first. Click the More Actions icon  next to the source and select Remove.
- Click Select source and select the source you want to use:
- Wix apps: Select the app (e.g. Wix Blog), then select the list you want (e.g. Posts or Related Posts). Click the Field dropdown, select a field and click Apply.
- Custom code: Select one of your custom code sources. If you don't have one yet, click Create New.
Connecting elements in your repeater
Connect the elements in your repeater so each item shows its own content. The elements already in your repeater connect when you connect the repeater. If you add elements after that (e.g. text or images), connect them yourself.
To connect an element in your repeater:
Go to your editor.
Select the relevant element inside your repeater.
Click the Open Inspector icon at the top right of the editor.
(If not already open) Click the Settings tab.
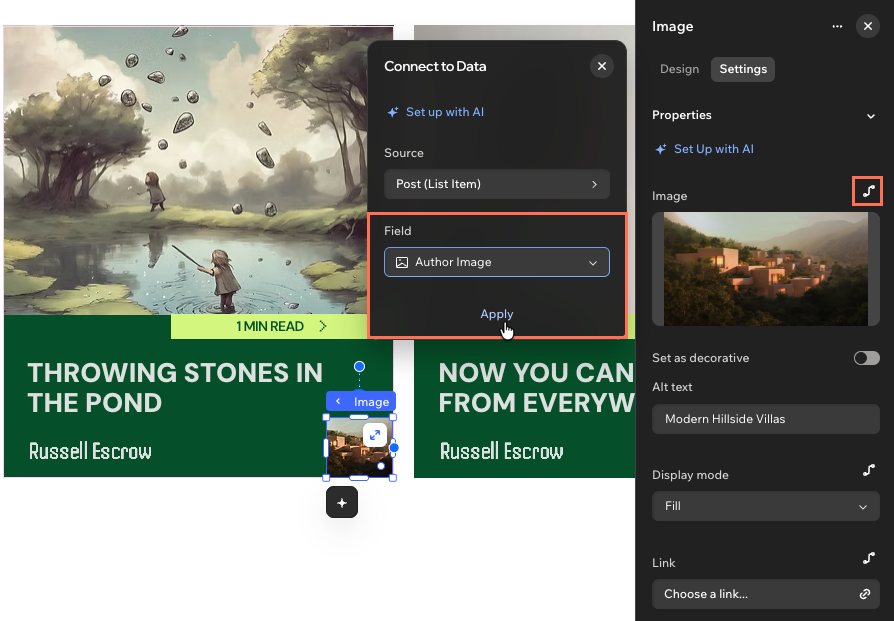
Click the Connect to data icon  next to the property you want to connect (e.g. Text, Link, Alt text).
Click Select field, then select the field you want the element to show. The source is already selected for you.
Click Apply.
Choosing which items show and in what order
Use the Data Settings panel to control your list. Filter the list to show only the items you want, sort it to set their order, and set how many items load at a time. You see your changes on the canvas as you work.
To manage your repeater's items:
- Go to your editor.
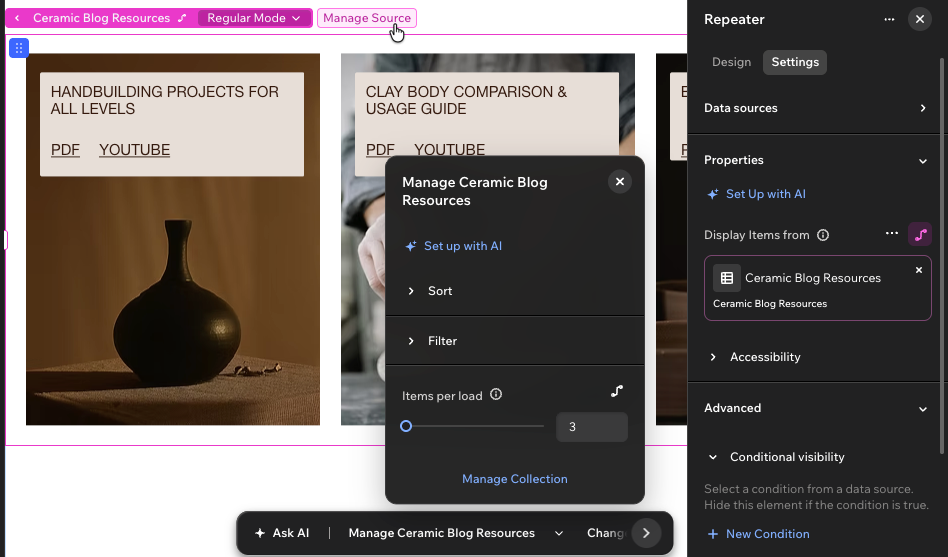
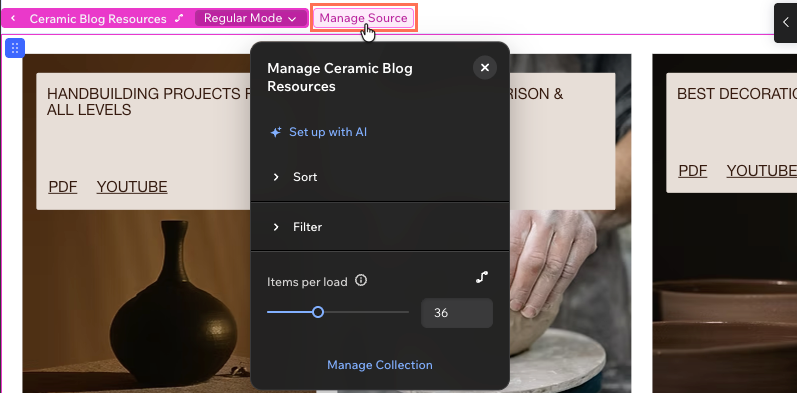
- Select your repeater and click Manage [source name] on the action bar (e.g. Manage Books).
Tip: If your repeater uses its section's or page's source, click the Data settings icon on the action bar instead.
- Choose what you want to do:
Filter to show only some items
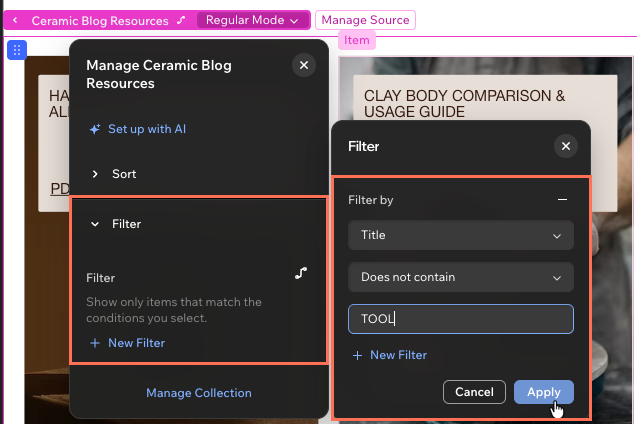
Use filters to show only the items that match conditions you set. For example, show only properties with a garden, or only paintings that are for sale. When you add more than one filter, an item must match all of them to show.
Click Filter.
Click + New Filter.
Click Select field and select the field you want to filter by.
Select the condition items must match (e.g. is or starts with). The conditions depend on the field's type.
Enter the value items must match.
(Optional) Click + New Filter to add another filter.
Click Apply.
Sort to change the order of items
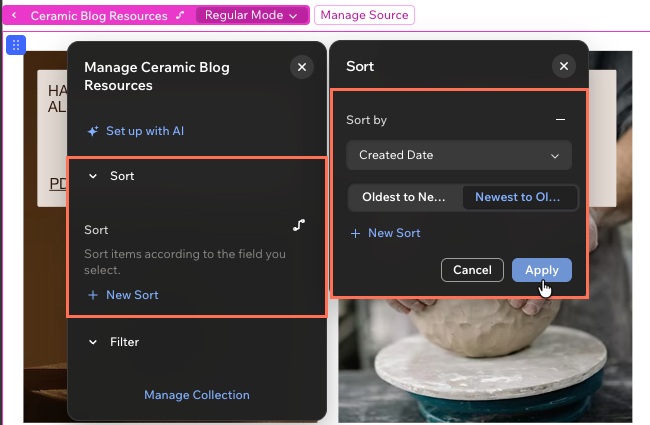
Use sorts to set the order your items appear in. You can add up to 3 sorts. Items follow your first sort, and items with the same value follow the next one. For example, sort by date, then by name for items with the same date.
Click Sort.
Click + New Sort.
Click Select field and select the field you want to sort by.
Select the order (e.g. A-Z or Z-A for text fields).
(Optional) Click + New Sort to add another sort for items that have the same value.
Click Apply.
Set how many items load at a time
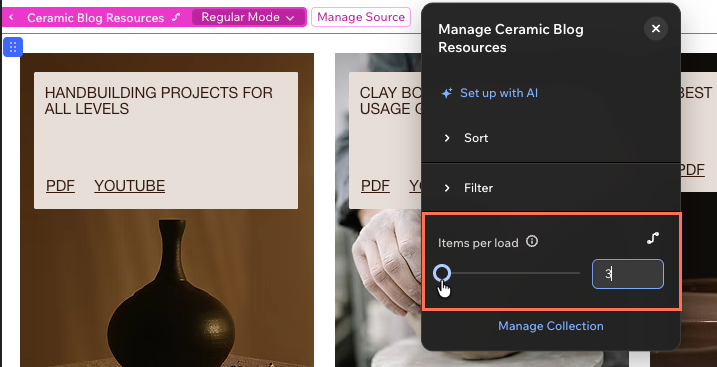
Drag the Items per load slider or enter a number in the field to set how many items load at a time. On your live site, visitors see the next set of items as they scroll down. You can also click the Connect to data icon next to Items per load to use a number from a field in a data source.
To show more items only when visitors click, add a Load More button. Find the steps in the FAQs at the end of this article.
Click Set up with AI at the top of the panel. Then describe the list you want (e.g. "Show the 6 newest projects").
Click Manage Data at the bottom of the panel to open your collection in the CMS. Add, edit or delete items there, or add new fields.
FAQs
Click a question below to learn more about repeaters in the Studio Two Editor.
Can I change the source my repeater shows?
Yes. Click the dropdown arrow next to Manage [source name] on the action bar and select Replace Connection. Select the new source, click Apply, then click Change.
You don't need to connect the elements in your repeater again. The editor connects them to fields in the new source for you. Check each element afterward. The editor might choose a different field than the one you want.
Can I connect more than one source to a repeater?
No. A repeater shows one source at a time. To show content from 2 sources, add a repeater for each one.
Do my filters and sorts change my collection?
No. Your collection keeps all its items. Filters and sorts only change which items show on your site and in what order.
Can I show different groups of items from the same collection?
Yes. Add a repeater for each group and give each repeater its own filter. For example, add one repeater that shows "Featured" items and another that shows "Latest" items.
Can I put my items in a custom order?
You can't drag items into a custom order. Instead, add a number field to your collection (e.g. "Display order"), give each item a number and sort by that field.
Can I add a Load More button to my repeater?
Yes. Add a button that shows the next set of items each time visitors click it. Each set has the number of items you choose under Items per load.
To do this, connect your section to a source first. Then connect your repeater and your button to the section's source. A source you connect to your repeater only works inside the repeater. A button outside the repeater can't use it.
Place the button outside your repeater (e.g. below it). A button inside your repeater shows up in every item.
To add a Load More button:
- Go to your editor.
- Make sure your repeater isn't connected to a source:
- New repeater: Click Skip for now on the repeater's banner.
- Connected repeater: Disconnect it, even if you want to use the same collection. Select your repeater and click the Open Inspector icon at the top right of the editor. In the Settings tab, click the More Actions icon next to the source under Connected sources and select Remove.
- Connect your section to a collection:
- Select the section your repeater is in.
- (If not already open) Click the Open Inspector icon at the top right of the editor.
- (If not already open) Click the Settings tab.
- Click + Connect Source under Data sources.
- Select your collection under CMS collection.
- Connect your repeater to the section's collection:
- Select your repeater.
- Click the Connect to data icon next to Display Items from under Properties.
- Click Select source and select the same collection. The field is selected for you.
- Click Apply.
- Set how many items show with each click:
- Select your repeater and click the Data settings icon on the action bar.
- Drag the Items per load slider or enter a number in the field.
- Add a button below your repeater and change its text (e.g. "Load More").
- Stop your repeater from loading items as visitors scroll:
- Select your repeater.
- Scroll down to Event handlers under Advanced.
- Click the X next to Load More.
- Connect your button to the collection:
- Select your button.
- Scroll down to Event handlers under Advanced.
- Click the Connect to data icon next to On Click.
- Click Select source and select the same collection.
- Click the Field dropdown and select Load More.
- Click Apply.
What do visitors see when my repeater has no items?
By default, they see nothing. When your repeater has no items to show, it doesn't appear on your live site. For example, this can happen when a filter doesn't match any items, or before you add items to your collection.
You can design what shows in your repeater's place instead. For example, add a message that says "No items found", or a button that links to another page.
To customize what shows when your repeater has no items:
- Click your repeater.
- Click the Regular mode dropdown on the repeater's label and select No Items.
- Add and design the elements you want visitors to see inside the repeater.
- Click the No Items dropdown and select Regular mode to go back to your items.
Can I change the layout of my repeater?
Yes. Click Change Layout on the action bar and select a layout: Cards, List, Slider or Advanced grid. With the Cards layout, you can also set how many items show in each row from the action bar.
Can I give every item its own page?
Can I add elements that are already connected to a Wix app?
Yes. After you add some Wix apps to your site (e.g. Wix Bookings, Wix Stores or Wix Events), you can add elements for that app from the Add Elements panel. These elements are already connected to the app's data, so you don't need to connect them yourself.
For example, find Wix Bookings in the Add Elements panel and add a Service list to show your services in a repeater.
Can I show a list inside each item of my repeater?
Yes, if each item in your source has its own list. For example, each service in Wix Bookings has its own list of staff members. To show that list, add a repeater inside an item of your main repeater. This works with lists from some Wix apps (e.g. Wix Bookings) and from custom code.