
Studio Two Editor: Adding and Setting Up Item Pages
This article refers to the new Studio Two Editor, released in November 2026. If you're unsure whether you’re using the Studio Editor or the Studio Two Editor, view more information here.
Use item pages to show each item in a CMS collection on its own page. Design 1 page, and every item gets its own version with the same layout and its own URL. Item pages replace the dynamic pages you may have used in the Studio Editor or Wix Editor.
You don't need a separate dynamic list page. To list your items, add a page with a repeater, or connect a repeater on any page.
Adding an item page
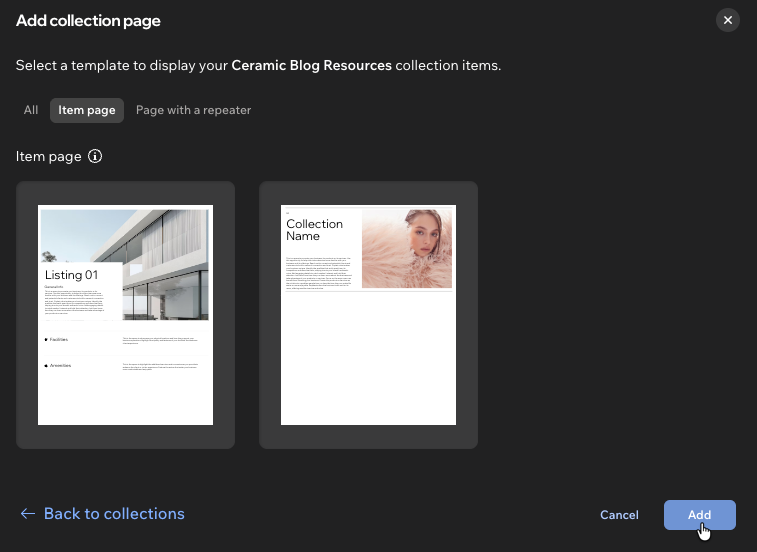
Add an item page from the Site Structure panel. Choose a collection, then pick a template. The template's elements arrive connected to the matching fields in the collection. Item pages show under Wix CMS in the Pages tab.
Add the CMS and a collection: The Collection page option only shows when the site has the CMS and at least 1 collection. Learn more about the CMS (Content Management System).
To add an item page:
- Go to your editor.
- Click the Site Structure icon at the bottom left.
- (In the Site Structure panel) Click the Pages tab.
- Click + Add Page at the bottom of the panel.
- Select Collection page.
- Select the collection you want to show and click Continue.
- Click the Item page tab.
- Select a template and click Add.
 at the bottom left.
Listing all your items: To show every item on 1 page, click the Page with a repeater tab in step 7 instead.
Previewing your items
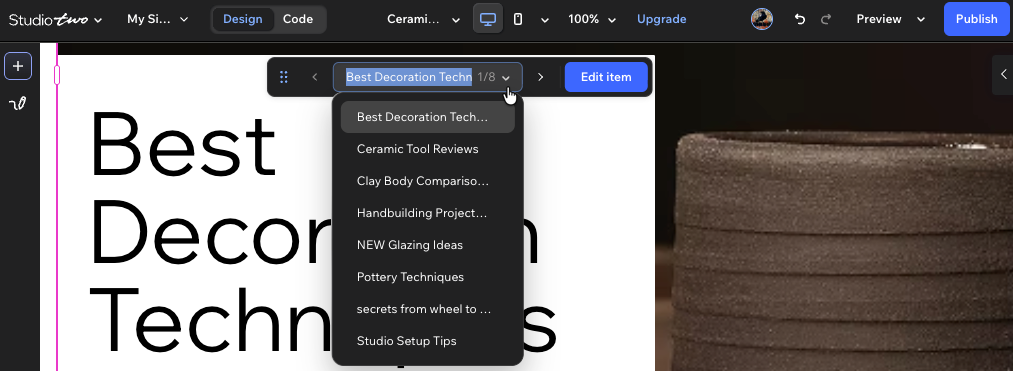
Use the preview toolbar at the top of the canvas to see the page with each item. Click the arrows to move between items, or click the dropdown to choose one. Check that the design works for every item, such as items with long titles or no image.
To change an item's content, click Edit item on the preview toolbar. The item opens in the CMS, where you can edit its fields and click Save.
Connecting elements on your item page
Connect elements anywhere on the item page. The page shows 1 item at a time, so you don't need a repeater. For example, add a text element and connect it to the collection's "Price" field.
Select the element, click the More Actions icon on the action bar and select Connect to Data. Then choose the item page as the source (e.g. Books (Item Page)) and choose a field. You can also connect from the Settings tab of the Inspector panel. Learn more about connecting elements to data sources.
 on the action bar and select Connect to Data. Then choose the item page as the source (e.g. Books (Item Page)) and choose a field. You can also connect from the Settings tab of the Inspector panel. Learn more about
Sources you can't select: A source is grayed out when it has no field that fits the element. For example, an image can't connect to a collection with no image field.
Linking your list to your item pages
Link each item in a repeater to its item page, so visitors can click an item to see its details. For example, link the Read More button in each repeater item.
Add the item page first: You can't create an item page from a repeater. Add one for the collection from the Site Structure panel first.
To link repeater items to their item pages:
Select the element inside a repeater item (e.g. a button).
Click the Open Inspector icon at the top right of the editor.
(If not already open) Click the Settings tab.
Click the Connect to data icon next to Links to.
(If needed) Click the source and select the repeater's list (e.g. Books List (Repeater Item)).
Make sure Get Dynamic Link is selected under Field.
Click Choose a link under Page Link Parameter.
Select the item page from the Page dropdown (e.g. Books item (Dynamic)) and click Done.
Click Apply.
 at the top right of the editor.
 next to Links to.
Editing your item page URLs
Each item page URL has 2 parts: a prefix for the whole collection (e.g. /books) and the item's slug (e.g. /1984). The slug comes from the item's Item slug field in the collection. Each slug must be unique in the collection and can have up to 100 characters.
Shared links stop working: Changing the prefix or a slug creates a new URL, so links you've already shared won't work. To redirect visitors from the old URL automatically, connect a custom domain first.
Click below to learn how to:
 next to URL ending.
Managing your item page settings
Manage the settings for all item pages in a collection from 1 place. In the Site Structure panel, hover over the item page, click the More Actions icon and select Settings.
Page URL: Change the URL prefix for the collection's item pages.
Access: Choose who can see the item pages: Everyone, Visitors with a password, or Members and paying subscribers.
SEO: Click Go to SEO Settings to set up SEO for all item pages at once.
Page info: See which collection the item page uses and how many pages it created.
FAQs
Click a question below to learn more about item pages in the Studio Two Editor.