Set up a Free Plan on Your Wix Site
In this article
- Creating a free plan
- Enabling guest checkout
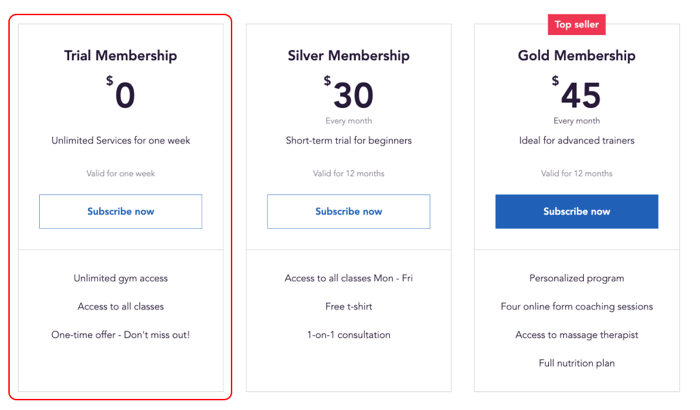
Let customers try your services before committing to a full membership plan or package by creating a free promotional plan that customers can book only once.
Note:
- Clients who try to purchase the plan a second time receive a notice that the plan can only be purchased once.
- Alternatively, you can offer a free trial period at the start of a pricing plan.
Creating a free plan
Free plans are a great way for potential clients to get to know you and your business. You can choose whether you want to offer the plan for free or for a reduced price.
You can create a free plan from your site's dashboard, the Wix app, or the Studio app.
Dashboard
Wix app
Wix Studio app
- Go to Pricing Plans in your site's dashboard.
- Click + Create Plan at the top right.
- Enter your plan's details in the Plan Info section:
- Enter the plan name.
- Add a cover image to showcase on your plan.
- (Optional) Enter a tagline with a brief description of the plan.
- Add perks under Tell customers what the main features are (e.g. First month free):
Note: What you enter here is what your clients see. It does not connect services or content to the plan (see the next step).
- Scroll down to Benefits and select the checkbox next the services or content types you want to include.
- Add the relevant details (e.g. the specific services that are included).
- Select Free under Pricing strategy.
- Choose the duration from the Length of Plan drop-down:
- Monthly: Select each one individually.
- Until canceled: Clients choose when they want to cancel.
- Custom: Choose the duration of the plan from the Choose period drop-down (weeks, months, years) and enter the relevant number.
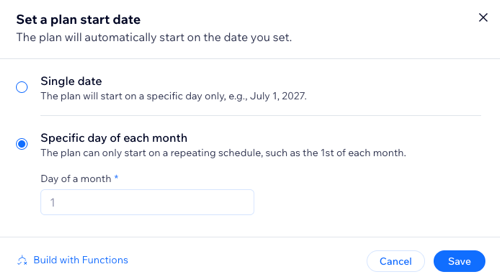
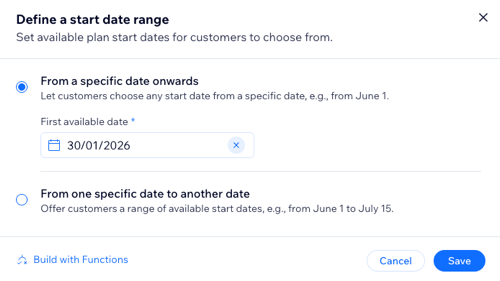
- Choose when you want the plan to start:
On a specific date
Chosen by customer
9. Scroll down to
Settings and choose how you want to adjust your free plan's settings:
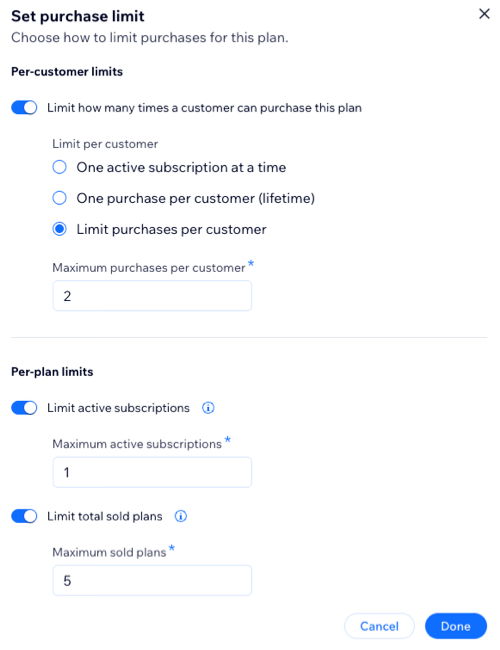
Set purchase limits
Allow plan cancellation
Add a policy

Add custom form fields for clients to fill
Customize a Thank You page

7. Click
Save at the top to finish creating your plan.
Notes:
- When clients subscribe to the free plan, they have instant access to its perks and benefits.
- During setup, the Let people choose their start date toggle is disabled since the plan is active immediately and does not require a payment.
- It is not possible to change the pricing strategy when there are active subscriptions.
Enabling guest checkout
You can allow visitors to your site to join your free plan without signing up or logging in. This is a great way to attract new clients who aren't sure they want to commit right away.
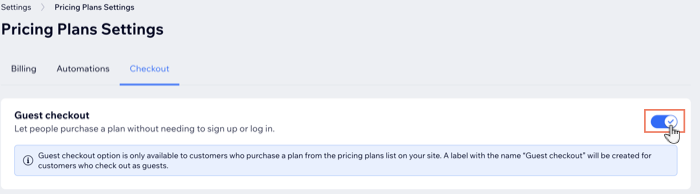
To enable guest checkout:
- Go to Settings in your site's dashboard.
- Click Pricing Plans Settings.
- Click the Checkout tab at the top.
- Enable the Guest Checkout toggle to let people buy a plan without signing up to your website.
- Click Save.