ADI: Adding and Managing Your Site's Pages
6 min read
Organize your content by dividing your site into pages. Wix offers a variety of page types, so you can find whatever you need to build your online presence.
You can add, reorder and delete pages to suit your needs. You can also choose which page is your homepage and set passwords on pages so that only those with the password can view the page.
In this article, learn more about:
Adding a page
You can add as many pages to your site as you wish. However, sites with a large amount of pages may take longer to load.
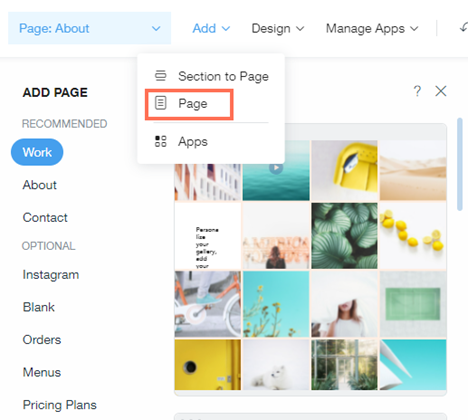
- Hover over Add on the top bar.
- Click Page.
- Choose a page template from the Add Page panel.
Tip: Click Blank to add a blank page.

Note:
If you add a page to a one-page site, the menu also changes. You will no longer see the page section names on the menu, just the page names. This makes it easier for your visitors to navigate around your site.
Changing the home page of your site
Choose which page is the home page of your site. The home page acts as the main page of your site and it is the page that your site URL leads to.
To change the home page of your site:
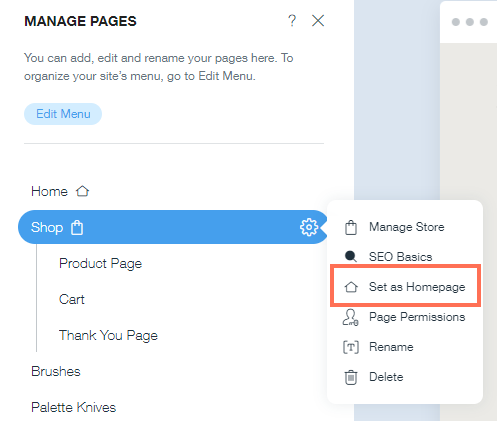
- Click the Pages menu in the top bar inside ADI.
- Click the page that you want to make the home page.
- Click the Settings icon
 .
. - Click Set as Homepage.

Applying page transitions
Engage your site visitors by adding a lively animation to the elements on your site. You can even apply a page transition style to your site to maintain your visitors' interest as they navigate through your site.
Note:
Your chosen animation is applied to all elements across your site.

To apply page transitions:
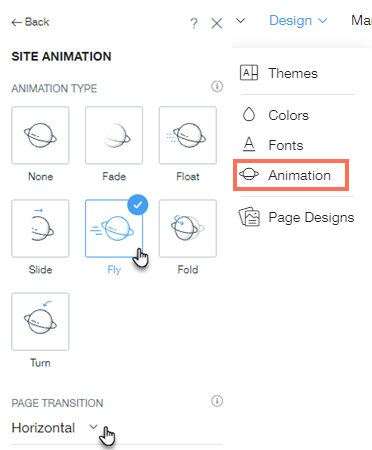
- Click Design on the top bar of the ADI Builder.
- Select Animation from the drop-down menu.
- Click an animation type to apply it to your site.
- Click the drop-down under Page Transition and select a page transition style.

Tip:
Click Preview on the top bar and click the pages on your site's menu to see the transitions in action.
Creating a sub-page
Place pages under other pages to create a subpage (drop-down) menu. Subpages are a great way to keep your site menu organized by grouping similar items together under one main page or category.
To turn a page into a subpage:
- Click the Pages menu on the top bar inside ADI.
- Click Edit Menu.
- Click the More Actions icon
 next to the page that you want to be a subpage.
 - Click Set as Subitem. The page will become a subpage of the main page above it.
Note: The URL of the page stays the same even after it becomes a subpage. For example, the URL for the subpage 'Lunch' under the main page 'Menus' is still www.mysite.com/lunch.

Notes:
- You can only create one drop-down menu under the main item. Subpages within subpages are not recommended as this layout can lead to a confusing user experience for your site visitors.
- If a page already has subpages attached to it, then it cannot be made into a subpage.
- If you decide to change the subpage back to a main page, click the More Actions icon
 beside the subpage and click Set as Main Item.
Deleting a page
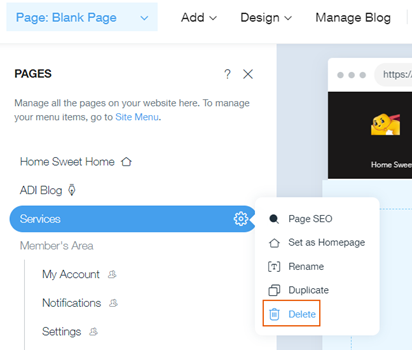
- Click the Pages menu on the top bar inside ADI.
- Hover over the page that you want to delete and click the Settings icon
 .
. - Click Delete.
- Click Delete on the pop-up.

FAQs
Click a question below to learn more about pages in ADI sites.
How do I reorder my site's pages?
Can I password protect a page?
Did this help?
|
 to the left of the page name.
 and select Page Permissions.
 appears next to the page in the Pages panel so you can keep track of the ones you've password protected.