

Wix Studio: Creating and Managing Recurring Invoices
4 min
In this article
- Creating recurring invoices
- Managing your recurring invoices
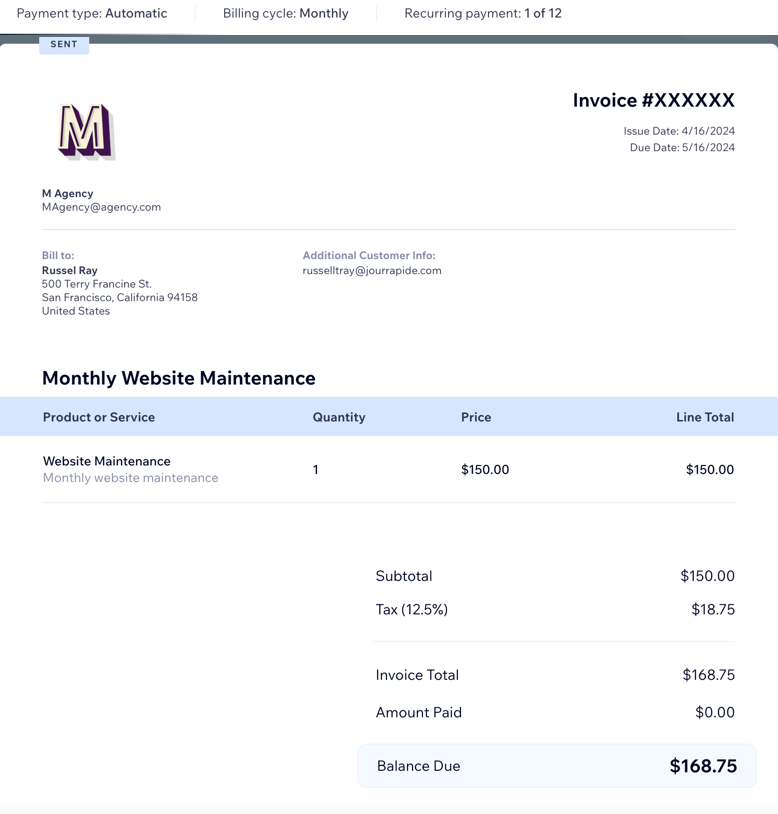
With Wix Studio, you can set up recurring invoices to simplify and automate the billing process for your clients. Whether you prefer weekly, bi-weekly, monthly, or yearly billing, you can choose the cycle that best aligns with your business needs. Once the first payment is processed, your clients will be automatically charged according to the selected cycle, saving you time and reducing manual billing efforts.
Wix Studio makes it easy to manage all your invoices in one place, allowing you to track the status of each payment and stay organized. You’ll have full visibility of upcoming payments, making it easier to follow up if necessary and keep your cash flow steady.
Before you begin:
Connect a payment method that supports recurring payments, such as Wix Payments.
In your Invoices tab, click More Actions at the top right and select Accept Payments.
Creating recurring invoices
Create recurring invoices to automatically charge your clients for your services on a regular basis. Choose from weekly, bi-weekly, monthly, or yearly billing cycles. Once your client makes the first payment, they’re automatically charged the same amount every billing cycle.
To create a recurring invoice:
- Go to CRM & Client Billing in your Wix Studio workspace.
- Click the Recurring Invoices tab.
- (First time only) Click Get Started.
- Click + New Recurring Invoice at the top right.
- Set the billing terms:
- Billing cycle: Choose how often to charge your client (Weekly, Bi-weekly, Monthly, or Yearly).
- Ends after: Choose when to stop the invoices (after 3 occurrences, 6 occurrences, 12 occurrences, Unlimited, or Custom).
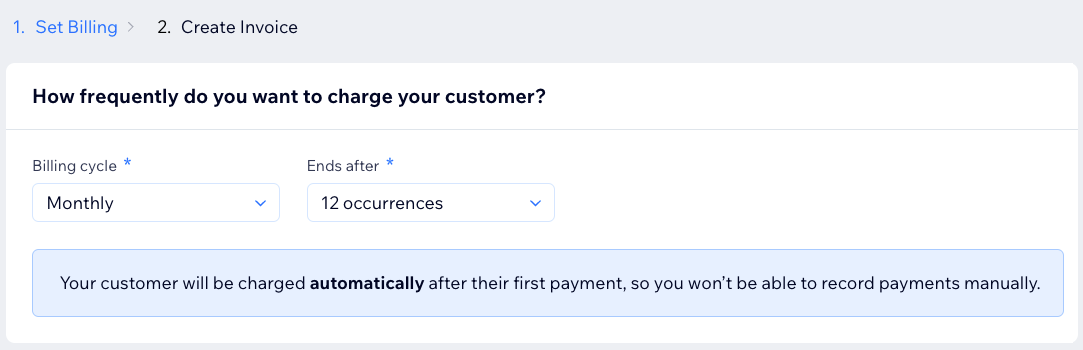
- Click Next.
- Enter the following details for the recurring invoice:
- Due Date: Choose a due date for the invoice.
- Customer: Choose a client for the invoice.
- Invoice Title: Enter a title for the invoice.
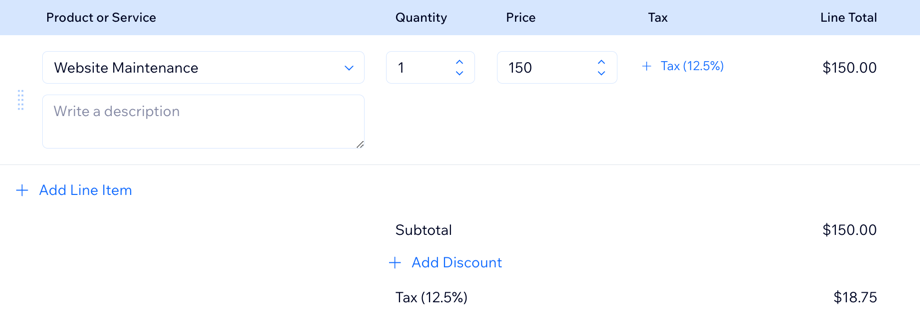
- Add the products or services to the recurring invoice:
- Product or Service: Select a product or service to add to the invoice. Click + Add New to create a new item.
- Quantity: Enter the quantity of the product or service.
- Price: Enter a price for the product or service.
- (Optional) + Add Tax: Add one or two tax rates to the line item.
- (Optional) + Add Line Item: Add additional products or services to your invoice.
- (Optional) + Add Discount: Apply a percentage discount to the total amount.
- Enter additional info for the invoice:
- Notes: Enter any notes you'd like your client to be aware of.
- Terms: Enter any terms that apply to this invoice.
- Choose what you want to do:
- Preview: View the invoice as your client will see it.
- Save: Click Save & Close to save the invoice and send it later.
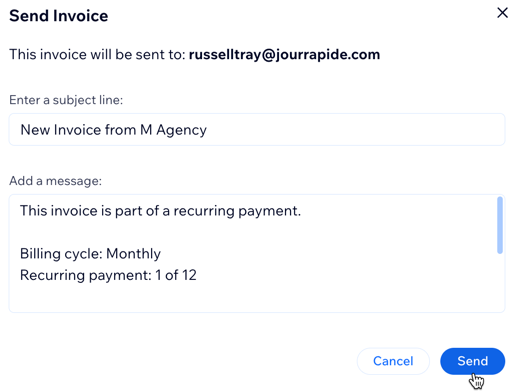
- Send: Click Send Invoice at the top right to review or edit the email content your client will receive with the invoice. Click Send to finalize and send it.
Managing your recurring invoices
Keep track of your recurring invoices and monitor payment statuses. You can resend, edit or cancel the recurring invoice.
To manage recurring invoices:
- Go to CRM & Client Billing in your Wix Studio workspace.
- Click the Recurring Invoices tab.
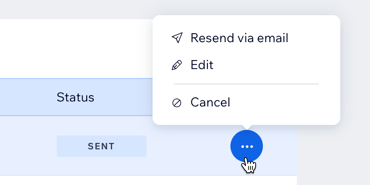
- Click the More Actions icon
 next to the invoice.
 - Select an action: Resend via email, Edit or Cancel the invoice.
Tip:
Individual invoices generated as part of a recurring invoice series (e.g. January invoice, February invoice, March invoice) can be accessed in the Invoices tab in your Wix Studio workspace.
From there, you can perform additional actions, such as sharing an invoice link, recording payment, duplicating an invoice and more.
